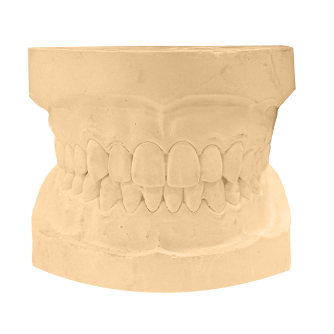
Moj Noroozi, Evident’s trusted lab technician, shares how dentists can make more predictable diagnostic wax-ups.
Diagnostic wax-ups, whether they’re digital or physical, should properly show how a patient’s teeth would look after treatment. They are great communication tools for patients, staff, and lab partners.
Having good wax-ups each time benefits case presentation, treatment planning, and lab partner collaboration.
This guide will help dentists collaborate better with labs to create improved diagnostic models.
Proper Intraoral Scan
Taking a proper intraoral scan will give the lab exact information on the patient’s oral anatomy. But just because intraoral scanners are considered more innovative and foolproof than PVS impressions doesn’t mean that dentists can’t go wrong with them.
There is a correct way to take an intraoral scan, especially if the scan will be used as a reference to create diagnostic wax-ups.
Dentists need to scan the following:
- Full Upper Arch
- Full Lower Arch
- Bite Scan
The bite scan lets labs know how the patient’s upper and lower arch come together to a closed position.
For most dentists, this could mean scanning two or three pairs of opposing posteriors on both the left and right sides. Some scanner software, such as 3Shape, will then automatically determine the patient’s bite.
However, that isn’t the case all the time.
Make sure to check the color map of the scanner software. Red areas typically indicate misalignment. When there are red areas shown on the color map, the bite scan would need to be taken again.
To be 100% sure when scanning the bite, scan the full arch when capturing the bite. This means also scanning the anteriors.
This will give the scanning software enough information to determine the patient’s bite.
A good scan does not have holes, missing areas, or misaligned bites. Partial arches or anterior-only scans are also no bueno.
Proper Facial Photos
In addition to the intraoral scans, proper facial photos are also required for a complete and comprehensive diagnostic wax-up.
Sending facial photos will allow lab partners and design centers, such as Evident, to create facially-driven diagnostic wax-ups. This means that the planned bite and smile will look great with the rest of the face.
Here at Evident, we require five different shots when submitting photos for smile design. (That includes diagnostic wax-ups).
These are:
- Natural Smile. Simply ask the patient to smile as if smiling for the camera.
- Exaggerated Smile. Have the patient widen their smile, as if smiling from ear to ear.
- Retracted Position. This shot is the patient’s bite while the cheeks are retracted. It would help to have the patient wear a cheek retractor.
- Shoosh Face. This shot shows the patient’s face while they’re making a “shoosh” sound. This means the lips have to make a circular opening.
- Lip Relaxed Repose. To capture this properly, tell the patient to say “Emma,” and then take the shot as they say “-ma.”
There are a few tips to follow when taking facial photos.
Make sure that the patient is well-lit. Dentists don’t need to have expensive studio lighting. The flash from a phone camera can be enough. What matters is that the facial features are decipherable.
Depending on the focal length of the camera, dentists may need to stand back to take a photo. But it’s a good idea to stand five feet away from the subject to minimize image warping.
Since it’s a facial photo, make sure the forehead and chin are not cut off. Include them in the shot. Some dentists like to include the shoulders and chest.
It may be a good idea to enable a 3×3 grid on the camera, especially for dentists who aren’t confident in their photography abilities. The 3×3 grid is a standard feature across phones, DSLRs, and mirrorless cameras. Once the 3×3 grid is enabled, align the patient’s eyes with the top horizontal line.
Proper Rx
The Rx tells the lab partner additional details that will be important to the case. It includes things like tooth shape, tooth length, and perhaps even diagnostic wax-up material.
The scan data that we’ve previously discussed — the upper arch, lower arch, and the bite, should be included in the Rx.
The facial reference photos as well.
Also specify the tooth design template, the tooth number(s) that will be added or altered, and the desired anterior teeth length.
Evident’s hub provides dentists with an extensive list of options to tick and select. We make sure that dentists leave no field or information left out.
If dentists have a 2D smile design photo they wish to be made into a 3D digital wax-up, we can service that as well.
Conclusion
Once dentists submit the proper intraoral scan, facial photos, and Rx, it will provide labs with complete information to give dental practices exactly the smile that they want for their patients.
Our Evident hub is a clean and streamlined portal where dentists can submit their scans, photos, and Rx. We also have a complete list of options, allowing dentists to tailor their requests without leaving any crucial data out.
We work with any intraoral scanner and printer. So, regardless of which intraoral scanner you use, we have the tools required to create a digital diagnostic wax-up that can be printed by your printer of choice. Or, milled by your choice mill.
Give us a call and get consistent, reliable, and predictable diagnostic wax-ups now.


