All-on-x cases are some of the most comprehensive and complex restorations dentists can do. However, these cases are also delicate. A small mistake in any area, whether it’s a 99% fit or an error in the scan, can result in complications in later stages of the workflow.
This would also mean that the fixed prosthesis would not be as perfect as it should be.
Moj Noroozi, Evident’s trusted lab technician, shares how dentists can make their all-on-x workflow more predictable.
These tips will help dentists create consistent and reliable outcomes in their all-on-x cases.
Proper Scanning Techniques
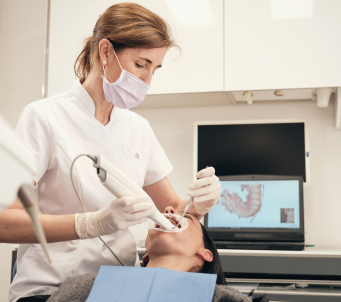
There are two scans dentists should capture when doing all-on-x cases. The scan-body scan and the pre-op scan.
Scan the Scan-Bodies
Scan-bodies are tiny, cylindrical structures that let intraoral scanners know the position and angulation of the implant.
These are seated on the implants and then scanned by an intraoral scanner.
The scan-bodies should be clearly seen above the gumline. So, this means that if an implant is placed deep, dentists will need a longer scan-body.
Also, make sure that the flat or bevel side of the scan-body is faced to the buccal side.
In addition, dentists should make sure that the scan-bodies are free of blood, saliva, or any bodily fluids. This will make the scan cleaner and more accurate. Dentists may use air or water syringes to cleanse the scan-bodies before scanning.
Taking proper scan-body scans will ensure that the restoration fits passively over the implants. This creates a more comfortable fixed prosthesis and reduces complications in the long term.
Scan the Pre-op
The pre-op scan contains a lot of crucial information that labs will need.
This includes the occlusal vertical dimension, the intaglio surface, the patient’s previous smile, and the patient’s previous bite.
Dental labs need to know this information so they can match or improve upon the patient’s previous dental anatomy.
When scanning the pre-op, here are some important tips to follow:
- Scan the denture, restoration, or existing teeth. Data from previous treatments, such as temps, may also be captured.
- Scan the tissue as much as possible. This includes the intaglio surface as well.
- Scan the old bite.
Gathering this data from the pre-op will create an optimal restoration in terms of form and function.
Labs will merge the scan-body scan and the pre-op scan. So, see to it that both these scans are properly taken.
Scanner Tips
Make sure to switch on the HD mode of the scanner. This mode may be called different things across different models and systems.
Essentially, intraoral scanners’ HD modes allow them to capture more detail. This allows them to capture soft tissue more precisely and can be especially beneficial for edentulous cases.
Also, make sure the scanner’s lens isn’t foggy. Clean the scanner’s lens before performing a scan to maintain accurate imaging.
Make Sure Rx is Detailed and Complete
In addition to the scans, dentists will also be sending an Rx to the labs they’re working with. This Rx will contain additional details that will be important to the case.
So, the Rx must be elaborate and complete.
The things a proper Rx for implant cases should include, in addition to the upper arch, lower arch, and pre-op scans, are:
- Patient name
- Implant system and Implant manufacturer’s name (e.g., Straumann, Nobel Biocare)
- Implant dimension
- Abutment size.
- Facial reference photos.
That last one will be imperative for designing facially-driven implant restorations.
Design centers, such as Evident, use facial reference photos to design a smile that is harmonious with the rest of the face. This smile design process is used as a blueprint and guide to fabricate the 3D version of that ideal smile.
Submit Design Preferences to Your Lab
Design preferences must also be submitted to the lab. This means informing them about:
- Tooth design template (e.g., rounded teeth, sharp teeth)
- Shade color for the teeth (e.g., A1, B1)
- Color for the gingiva (e.g., G1, G2)
- Restoration material (e.g., Zirconia, Temp)
- Optimum Anterior Teeth Length
These design aspects should be placed in the Rx as well.
Evident streamlines this process when we create the smile design.
When practices submit their facial reference photos to us, we construct a 2D smile design, following universal aesthetic laws, such as the Golden proportion.
We decide and design the best smile, taking into account things like the best anterior teeth length, best teeth shape, and buccal corridors, among other things.
When the patient is happy with the 2D smile mock-up that we made, we then proceed to create a complete 3D version of the mock-up. This design contains the most aesthetic teeth shape while also noting the ideal materials and shades.
Evident’s designed all-on-x is facially-driven. Dentists may send our designed .stl file to their lab of choice without worrying about the aesthetic outcome.
Conclusion
Following all these crucial all-on-x tips, dentists can reliably and consistently satisfy their all-on-x patients.
This also means fewer errors and long-term complications for patients. So, dentists can expect to see improved service and better-quality healthcare.
But more importantly, having a predictable all-on-x system allows dentists to scale their implant-based services.
Here at Evident, we serve as labs’ and practices’ own digital design department. We can design smile mock-ups, temporaries, all-on-x, and surgical guides — everything you may need to improve your all-on-x offering.
We work with any system and workflow. So whether you’re partly analog or using different brands’ digital tools, we got your back.
Give us a call now and scale your all-on-x service.