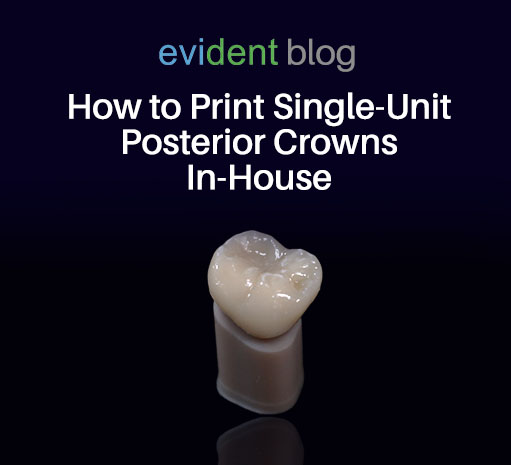
Traditional methods of creating single-unit posterior crowns require a lot of space, equipment-wise. Yet, we’re now capable of 3D printing single-unit crowns with machines as compact as coffee makers.
Thanks to recent tech advances, simple dental restorations can now be crafted in-house, regardless of your workspace.
To 3D Print a single-unit posterior crown in-house allows you to offer single appointment services. As a result, you create a better patient experience and are able to see more patients in a month. Needless to say, printing your crowns in-house can benefit several business aspects of your dental practice.
With that said, here’s how you can immediately get into in-house posterior crown printing:
Step#1 Scan
First, dentists need to get a digital impression of the patient’s mouth.
These digital impressions are saved in a digital scan file that they can send to any design facility. This makes collaborating with partners much easier, resulting in a faster turnaround time for the final crown.
In addition, digital scans are much more accurate at capturing the patient’s mouth than dental wax is. This allows for a better-fitting final crown once it’s designed and printed.
Do You Need Intraoral Scanners to 3D Print Single-Unit Crowns In-House?
Some dentists don’t have intraoral scanners and, hence, cannot send intraoral scans to digital design companies.
There are labs that work with traditional impressions, but you’ll still have to ship these physical impressions. There’s a lot of downtime with this process, as well as shipping costs.
Yes, IOS scanners are optional for printing crowns in-house. Clinics can still print in-house without them.
But compare the long-term shipping costs to sending digital IOS scans over the internet. This difference justifies an IOS scanner’s cost.
If you wish to get into digital dentistry and optimize your business workflow, get an intraoral scanner. It’s the first step you can take toward one-visit dental restorations.
Here at Evident, we supply Medit intraoral scanners, along with a comprehensive, committed 24/7 support team to aid our purchasers.
Step#2: Design
Once the digital impression is captured, dentists may use the appropriate CAD/CAM software to design crowns over that digital impression. Popular CAD/CAM software used for designing crowns, and other dental restorations, includes 3Shape and exocad. The design process generates a ready-to-print model file that dentists can use to 3D print or mill the final restoration.
However, the design portion of dental restoration requires a heavy up-front cost (i.e., CAD/CAM design software, capable hardware, additional labor), plus adequate training. Doing the crown design in-house may not be beneficial to smaller clinics, especially if they have a limited workforce. So, dentists typically outsource the design process to labs and design facilities.
You can outsource design partners and still provide in-house printing. Choosing the right design partner is crucial if you want to maintain business-efficient operations.
At Evident, we provide quick design services that allow our partner dentists to 3D print same day single-unit crowns.
Simply send the following to Evident:
- Rx
- Intraoral Scans
We employ over a hundred well-trained, specialized case designers to design cases, from crowns and bridges to full arches. All our designers are well-equipped with 3Shape and exocad knowledge, making for a quick but quality output.
You’ll get a ready-to-print, final crown design within 24 hours, or if you’re in a hurry, only 30 minutes. Once you have this design, you can immediately have it printed.
Step#3: Print
Once your partner dental design facility has sent the final design, you need a way to print that design immediately. Here’s what you need to look for in your equipment when 3D printing single-unit crowns:
Choosing a 3D Dental Printer
Assess your needs when looking for a dental 3D printer. As a clinician, you aren’t likely going to be producing tall, complex orders. Simple restorations, such as single-unit posterior crowns, can benefit from the following specifications:
- Build Volume: Dental printers’ build volume refers to the maximum size of the object that can be printed. A build volume of at least 100 x 100 x 100 mm is recommended for most simple dental restorations. Though more commonly used in-house 3D dental printers can print as little as 45 x 28 x 75 mm — perfect for single-unit crowns.
- Layer Thickness: This refers to the thickness at which the printer can dispense resin. If a printer’s layer thickness shows 25 microns (µm), that means each dispensed layer can be just as low. A lower layer height can result in finer details in the printed object. A layer height of 50 µm or less is recommended for printing dental restorations with high accuracy and detail.
- Printer Resolution: This refers to the printer’s capability to print the horizontal area. An XY resolution of 50 µm or less is recommended for simple restorations, such as posterior crowns.
- Size and Weight: You can’t have an in-house printer if it doesn’t fit in your office. Consider the size of the printer you’re eyeing. Check if there’s any vacant space in your clinic that can accommodate it. Dental 3D printers can be as small as 28 x 28 x 37 cm and weigh less than 10 kg. That occupies as much space as a small kitchen trashcan.
Some popular dental 3D printers that dentists favor include Ackuretta Sol, Micro Plus cDLM, and Formlabs Form 3B.
It’s important to note that there’s a learning curve that comes with using a dental 3D printer. They aren’t as intuitive and easy to use as advertisers will make them seem.
However, this is an important hurdle to overcome if you wish to print posterior crowns in-house. Also, learning to use a dental 3D printer is significantly easier than understanding the technicalities of the entire fabrication process.
Resin
Once you’ve chosen your desired dental 3D printer, a sales agent will go in-depth on what resins you can and cannot use with that printer. Typically, sales agents will package the brand-formulated, specialized resin together with the 3D printer unit you’ve purchased.
You can’t go wrong with any brand-formulated resins from the 3D printer supplier since they are specially formulated to work with the printer. Suppliers also offer a wide range of resin shades, allowing you to print the appropriate crown shade to match your patients’ surrounding teeth.
However, there are some generic names and resin types you should take note of, especially for posterior crowns:
- Zirconia: Though Zirconia is more commonly used for milling, it can also be 3D printed. Clinicians can use Zirconia-filled resins to 3D print a crown that can endure the bite force of posterior teeth but still have the aesthetic properties of a tooth.
- Lithium Disilicate: Lithium Disilicate ceramic resins are known for their high flexural strength, fracture toughness, and wear resistance. They also offer better aesthetics than zirconia, making them a popular choice for patients who want a natural-looking restoration.
- PMMA: Polymethyl methacrylate is a commonly used material in dentistry for temporary restorations. Though PMMA doesn’t offer the same flexural strength and durability as either Zirconia or Lithium Disilicate, it can be great for temporary restorations. They’re also relatively more affordable than most resins.
- Composite resins: When compared to ceramics like zirconia and lithium disilicate, composite resins are more affordable, print quicker, and are more customizable in terms of appearance. Composite resin, however, is weaker than ceramics, which could have an impact on the restoration’s toughness and longevity. Dentists may use Saremco Print Crowntec Resin to quickly print posterior crowns that are much stronger than PMMA.
Verify with your resin supplier your order’s compatibility with different 3D printers. Some resins and composites may not work well with specific printers, resulting in material wastage.
3D Printing Single-Unit Crowns In House
Implementing in-house 3D printing for single-unit crowns doesn’t necessarily require you to shoulder the entire design and fabrication process. By collaborating with a dependable digital design company, you can enhance your workflow efficiency, enabling crown production the same day. This approach helps you avoid the need for costly design software investments.
Starting simply necessitates an in-house printer and a reputable partner such as Evident, which can deliver precise, print-ready designs in as little as 30 minutes. Leveraging Evident’s proficiency and seasoned experience, you can boost your business workflow, expedite turnaround time, and curtail the learning curve.
Don’t let complex design software or time-consuming fabrication processes slow down your practice. Work with Evident to get the fast, and precise designs to deliver the best possible outcomes for your patients. Contact us today to learn more.