In Collaboration with Dr. Rick Ferguson DMD, DABOI/ID, DICOI

Missing teeth compromise patient satisfaction and quality of life.
Immediate digital dentures offer a precise, efficient, and superior solution, revolutionizing tooth replacement and seamlessly integrating into your digital workflow, restoring function, aesthetics, and confidence for patients suffering from tooth loss due to decay, injury, or gum disease.
However, many practices hesitate due to the perceived learning curve of digital workflows.
The good news is, with Dr. Rick Ferguson’s streamlined approach and the right tools, you can confidently 3D print for both immediate and long-term dentures in-house.
This guide also contains all the information you need to train your staff. Let’s break down the digital denture workflow into three simple steps:
Step 1. Gather Information During the Patient Visit (Record Appointment)
1.1 Capture Intraoral Scans

Utilize an intraoral scanner to create a 3D digital model of your patient’s oral anatomy. Three scans are typically required:
- Upper: A complete scan of the upper jaw where the denture will rest.
- Lower: A complete scan of the lower jaw where the denture will rest
- Bite Registration: Capture the patient’s bite relationship to ensure proper occlusion.
Note:
- Ensure the scan clearly captures all relevant anatomy, including any undercuts or bony prominences.
- No need to worry about existing teeth. They can be digitally removed to create immediate dentures seamlessly.
1.2 Compile Your Patient’s Treatment Plan Information

After completing the intraoral scan, you will need to gather and organize essential details for the treatment plan. Follow these steps to ensure you have all the necessary information.
- Collect Patient Demographics:
- Patient’s name
- Contact information
- Date of birth
- Document the Chief Complaint: Understand the patient’s primary reason for seeking dentures (e.g., difficulty chewing, tooth mobility, dissatisfaction with appearance).
- Summarize Diagnostic Findings: Document any relevant findings from the intraoral scan (e.g., ridge resorption, bony undercuts).
- Record Treatment Goals: Document the patient’s expectations for the denture treatment. This may include:
- Improved aesthetics (e.g., tooth shape, size, color)
- Restored function (e.g., chewing ability, speech)
- Increased confidence
- Discuss Long-Term Goals: Ensure the denture treatment aligns with the patient’s overall oral health goals.
Once you have compiled all this information, you are ready to submit the case for design to Evident.
Step 2. Submitting Your Case To Evident Hub
2.1 Log in to Evident & Order
Log in to Evident
To submit your case to Evident, please log in to your account at Evident Hub.
If you do not have an account yet, click on “Get Started” and select “Create Account.”
Ordering Process
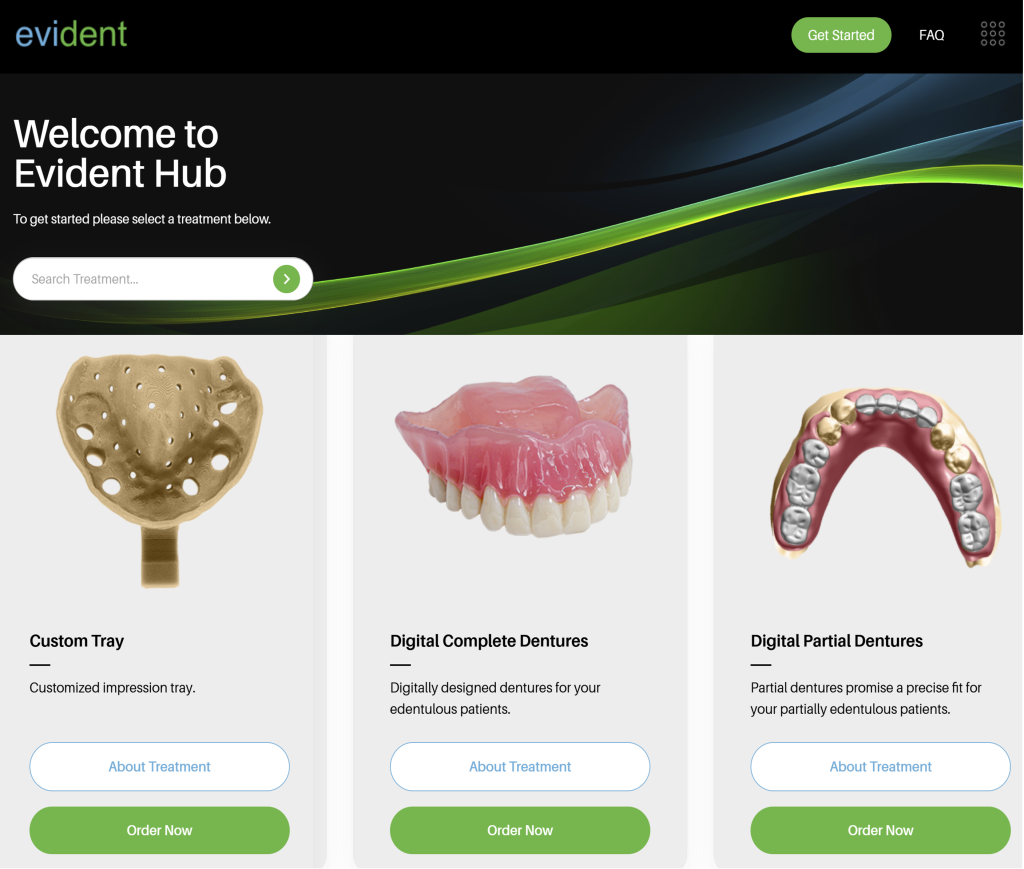
Once logged in, browse the list of products on the Hub and locate “ Digital Complete Dentures”
Click on “Order Now” to proceed with your order.
2.2 Upload Case Information
This guided ordering form ensures that the vision of both the patient and the doctor is precisely communicated to our design team. Follow these steps to complete the form:
Add Patient Information:
Fill in your practice name, email address (optional), patient’s last name, first name, and date of birth (optional).
You can choose to rush this case to get your designs back as soon as possible.

Type of Complete Dentures:
Select one of the following options:
- Full Dentures: For patients who have lost all their teeth in one or both arches.
- Copy Dentures: For patients who want an exact replica of their existing dentures.
- TruDent Denture: Stratasys TrueDent™ is a light-curable resin indicated for the fabrication of dental appliances including removable full and partial dentures, denture bases, denture teeth, in dental laboratories. The material is an alternative to traditional heat-curable and auto polymerizing resins. Stratasys TrueDent™ is intended exclusively for professional dental work.
To find out more about Statasys TrueDent™ click here
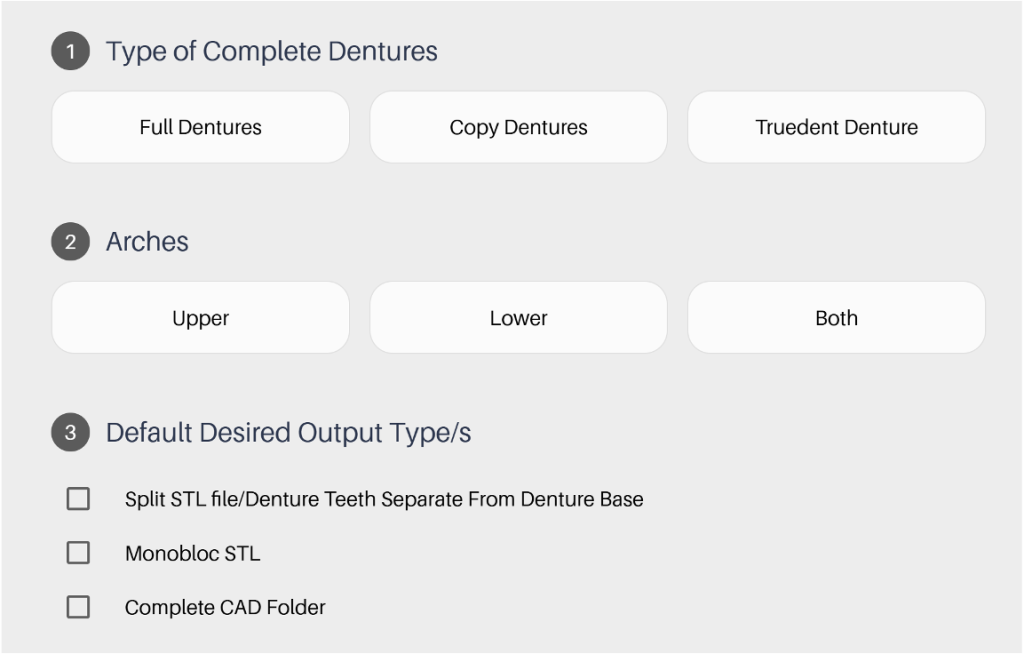
Arches:
Indicate the arch(es) for which the dentures are needed:
- Upper
- Lower
- Both
Default Desired Output Type(s):
Choose your preferred file format(s):
- Split STL file/Denture Teeth Separate from Denture Base: Provides separate files for the denture base and teeth, allowing for more customization during manufacturing.
- Monobloc STL: Provides a single file for the entire denture, suitable for certain manufacturing processes.
- Complete CAD Folder: Includes all the design files related to the denture, providing the most comprehensive data
Is This An Immediate Denture?
Select one:
- Yes (Denture will be placed immediately after tooth extraction)
- No (Denture will be placed after the extraction sites have healed)
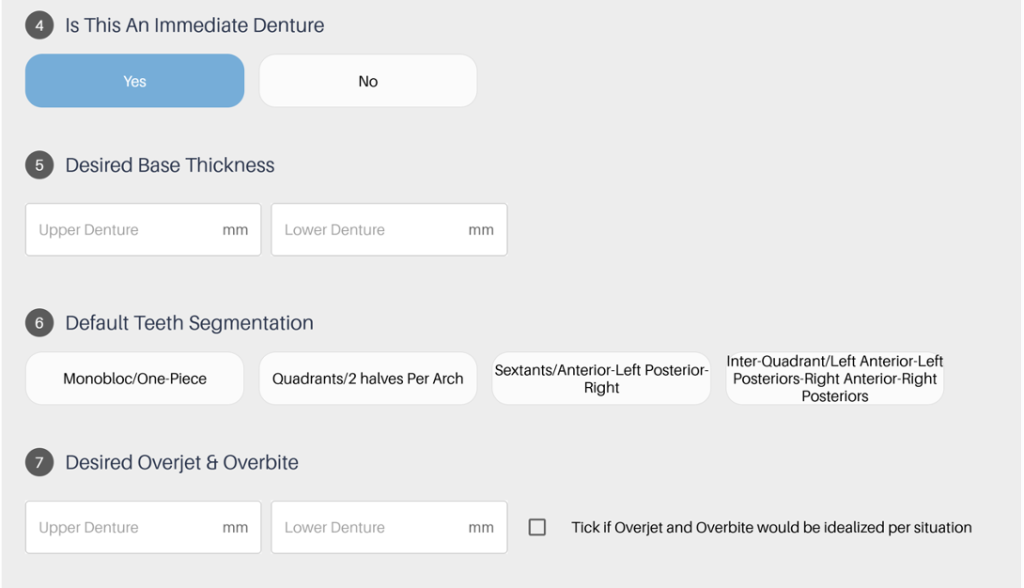
Desired Base Thickness:
- Upper Denture: Specify the desired thickness in millimetres (mm).
- Lower Denture: Specify the desired thickness in millimetres (mm).
Default Teeth Segmentation:
Select the preferred segmentation for denture manufacturing:
- Monobloc/One-Piece: Entire denture in a single unit.
- Quadrants/2 halves Per Arch: Denture divided into two halves per arch.
- Sextants/Anterior-Left Posterior-Right: Denture divided into six sections (three per arch).
- Inter-Quadrant/Left Anterior-Left Posteriors-Right Anterior-Right Posteriors: Denture divided into four sections (two per arch).
Desired Overjet & Overbite:
- Upper Denture: Specify the desired overjet in millimetres (mm).
- Lower Denture: Specify the desired overbite in millimetres (mm).
- Idealized Overjet and Overbite: Check this box if you want the overjet and overbite to be adjusted to ideal values based on the patient’s anatomy
Gingiva Esthetics/Festooning:
Select the desired
- Delicate: For a subtle, less pronounced gum line.
- Natural: For a realistic gum line that mimics natural gums.
- Intense: For a more prominent, defined gum line.
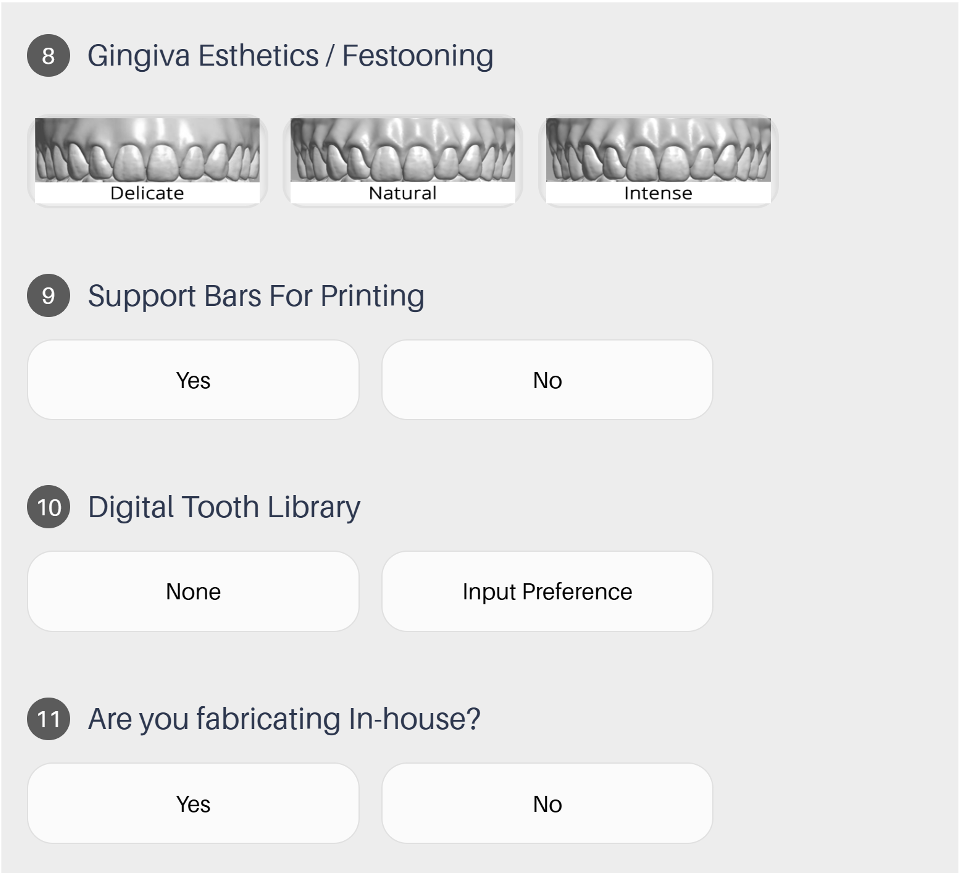
Support Bars for Printing:
Indicate whether support bars are needed for 3D printing:
- Yes: If you require support structures for overhangs during printing.
- No: If no support structures are necessary.
Digital Tooth Library:
Specify your preference for the artificial teeth:
- None: If you will provide your own tooth models or scans.
- Input Preference: If you have a specific brand, type, or characteristic preference for the teeth, please specify here.
Are you fabricating In-house?
If you are printing your design in-house, you can customize your fabrication preferences to streamline the process. Follow these steps to ensure your design is ready for printing:
- Indicate In-House Fabrication: Select ‘Yes’ or ‘No’ to indicate if you are fabricating the design in-house.
- Choose Your Printer: If you selected ‘Yes’ for in-house fabrication, choose your printer from the dropdown menu.
- Specify Resin Type: Enter the type of resin you will 3D print with
- Select Pre-Nested Files: To make the fabrication process even easier, opt for pre-nested files. This ensures that your design is ready to print with proper supports, so all you need to do is drag, drop, and print. There is an additional fee per build plate for pre-nested files.
By setting these preferences, you can ensure a smooth and efficient printing process, with designs that are ready to go and require minimal preparation.
RX Notes:
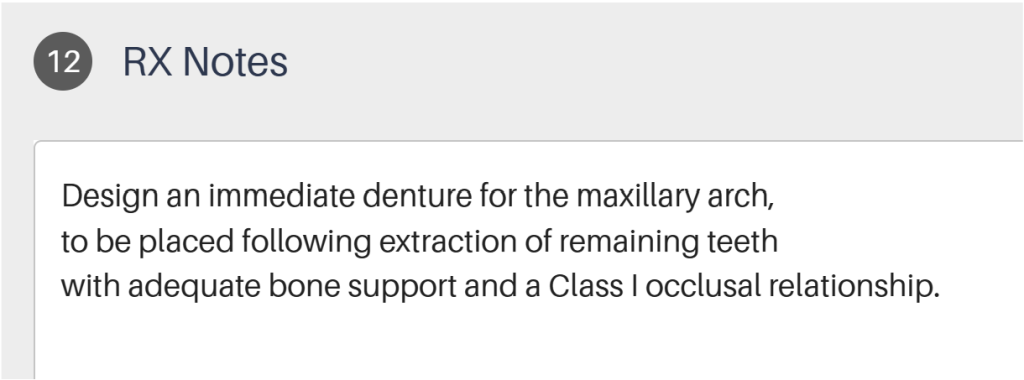
To ensure the desired outcome for your patient’s digital dentures, please provide clear and concise instructions for our design team. For example:
Design an immediate denture for the maxillary arch, to be placed following extraction of remaining teeth with adequate bone support and a Class I occlusal relationship.
Upload Required Files:
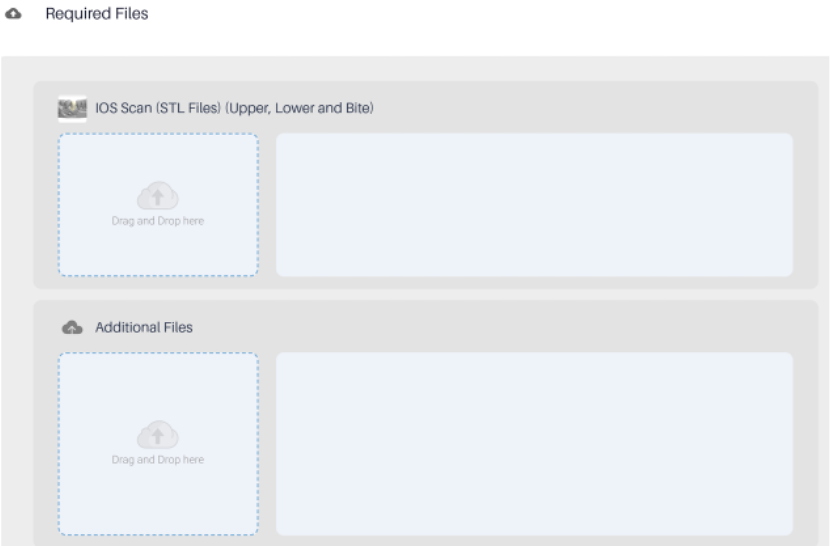
- Intraoral Scans (STL or PLY files):
Upper Arch Scan
Lower Arch Scan
Bite Registration Scan - Additional Files (Optional, but highly recommended):
Photos: Upload high-resolution intraoral photographs of the patient’s edentulous ridges, surrounding tissues, and any remaining teeth. This helps our designers visualize the anatomy and optimize the denture fit.
Review and Submit:
Ensure all information is accurately filled out and all required files are uploaded. Click ‘Proceed’ to submit the form.
2.3 Track Progress and Communicating with Your Designer

To ensure a seamless experience and stay informed about the progress of your designs, you can track and communicate with your designer through the Case Management section. Here’s how:
- Review Case Progress: Access the Case Management section to review the progress of your case at any time. Stay updated on the current status and any actions taken by the design team.
- Messages Your Designer: If you have questions or need to share details, easily send messages to your designer in the Case Management section.
- Review and Approve Your Case: Review your selected CAD files using the preview files (HTML viewer). This feature allows you to see the designs in detail and make any necessary adjustments or approvals before finalizing the case. Once the design meets your requirements, you can approve and download the file.
By using these features, you can efficiently manage your cases, ensure clear communication with your designer, and approve designs with confidence.
2.4 Your Case is Complete
Once complete, you will receive the following files:
- HTML preview viewer for STL design files, including appended scan data

- Resin Support Nested 3D Printable File

Step 3. Fabricate Your Design
3.1 Download nested files from Evident
After your case is complete, you can download the print-ready design files by selecting your case in case management tab.
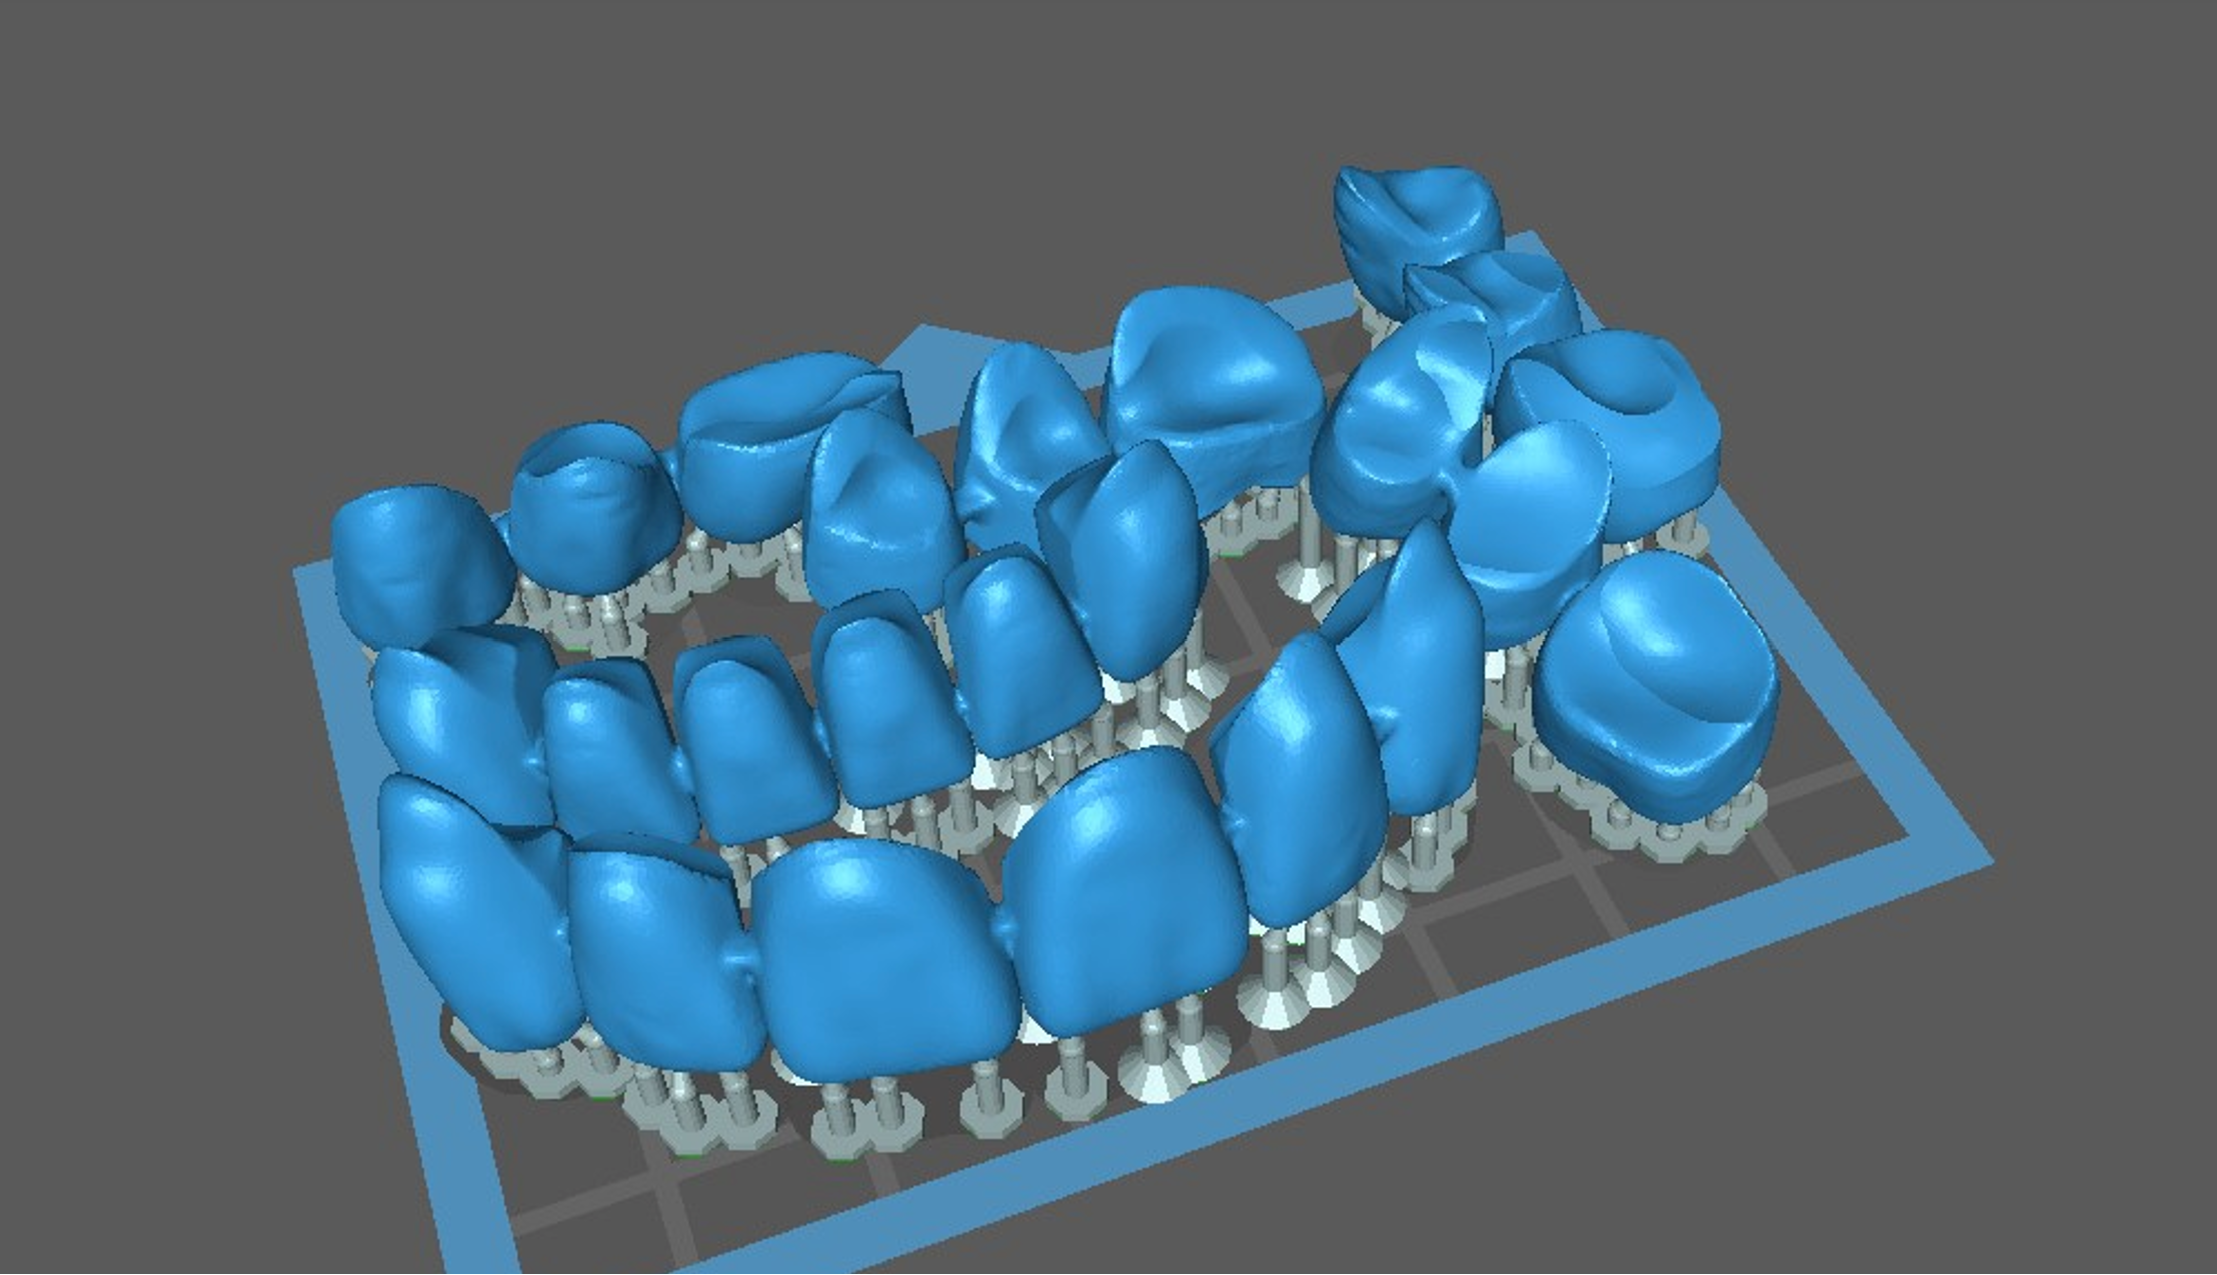
3.2 It’s Time To 3D Print


Fabricate your design using your in-house 3D printing workflow. Follow three steps:
- 3D Print your design.
- Clean the 3D printed design to remove any residual resins
- Cure it to finalize its durability.
For detailed process and workflow instructions specific to your 3D printer model and resin, please contact your 3D printer manufacturer’s support team
Also, you can join the Dental 3D Printing group on Facebook for expert support and insights from Dr. Rick and other members to achieve success with your 3D printing projects.
Congratulations!
The Immediate Denture Is Now Ready!


If you have any questions about the process, feel free to email us at akang@evidentdigital.com or call us at +1 (877) 909 7770.
To further streamline your workflow, we can help by coordinating fabrication. Here’s how we can assist:
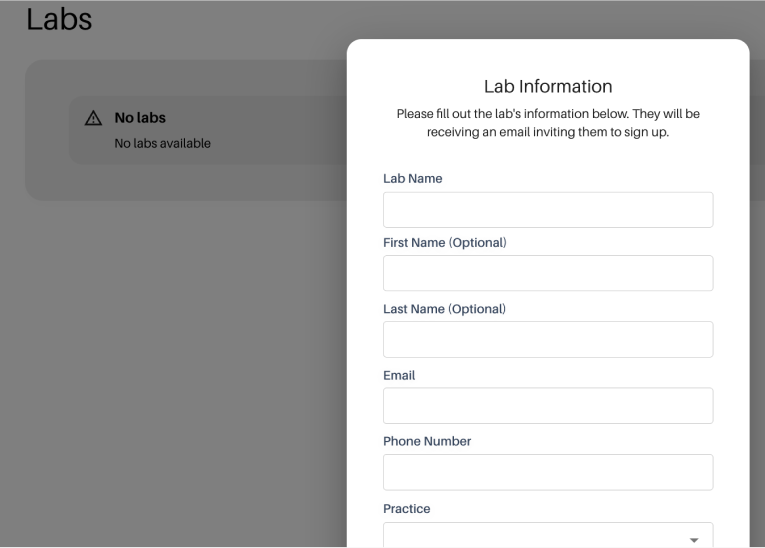
- Invite your existing lab: You can invite your preferred lab by choosing the option in the top right corner of the Evident Hub screen. We will help coordinate the fabrication process with them.
- Ask Evident for a preferred lab partner: Alternatively, your account manager can suggest an Evident preferred lab partner for a seamless experience.