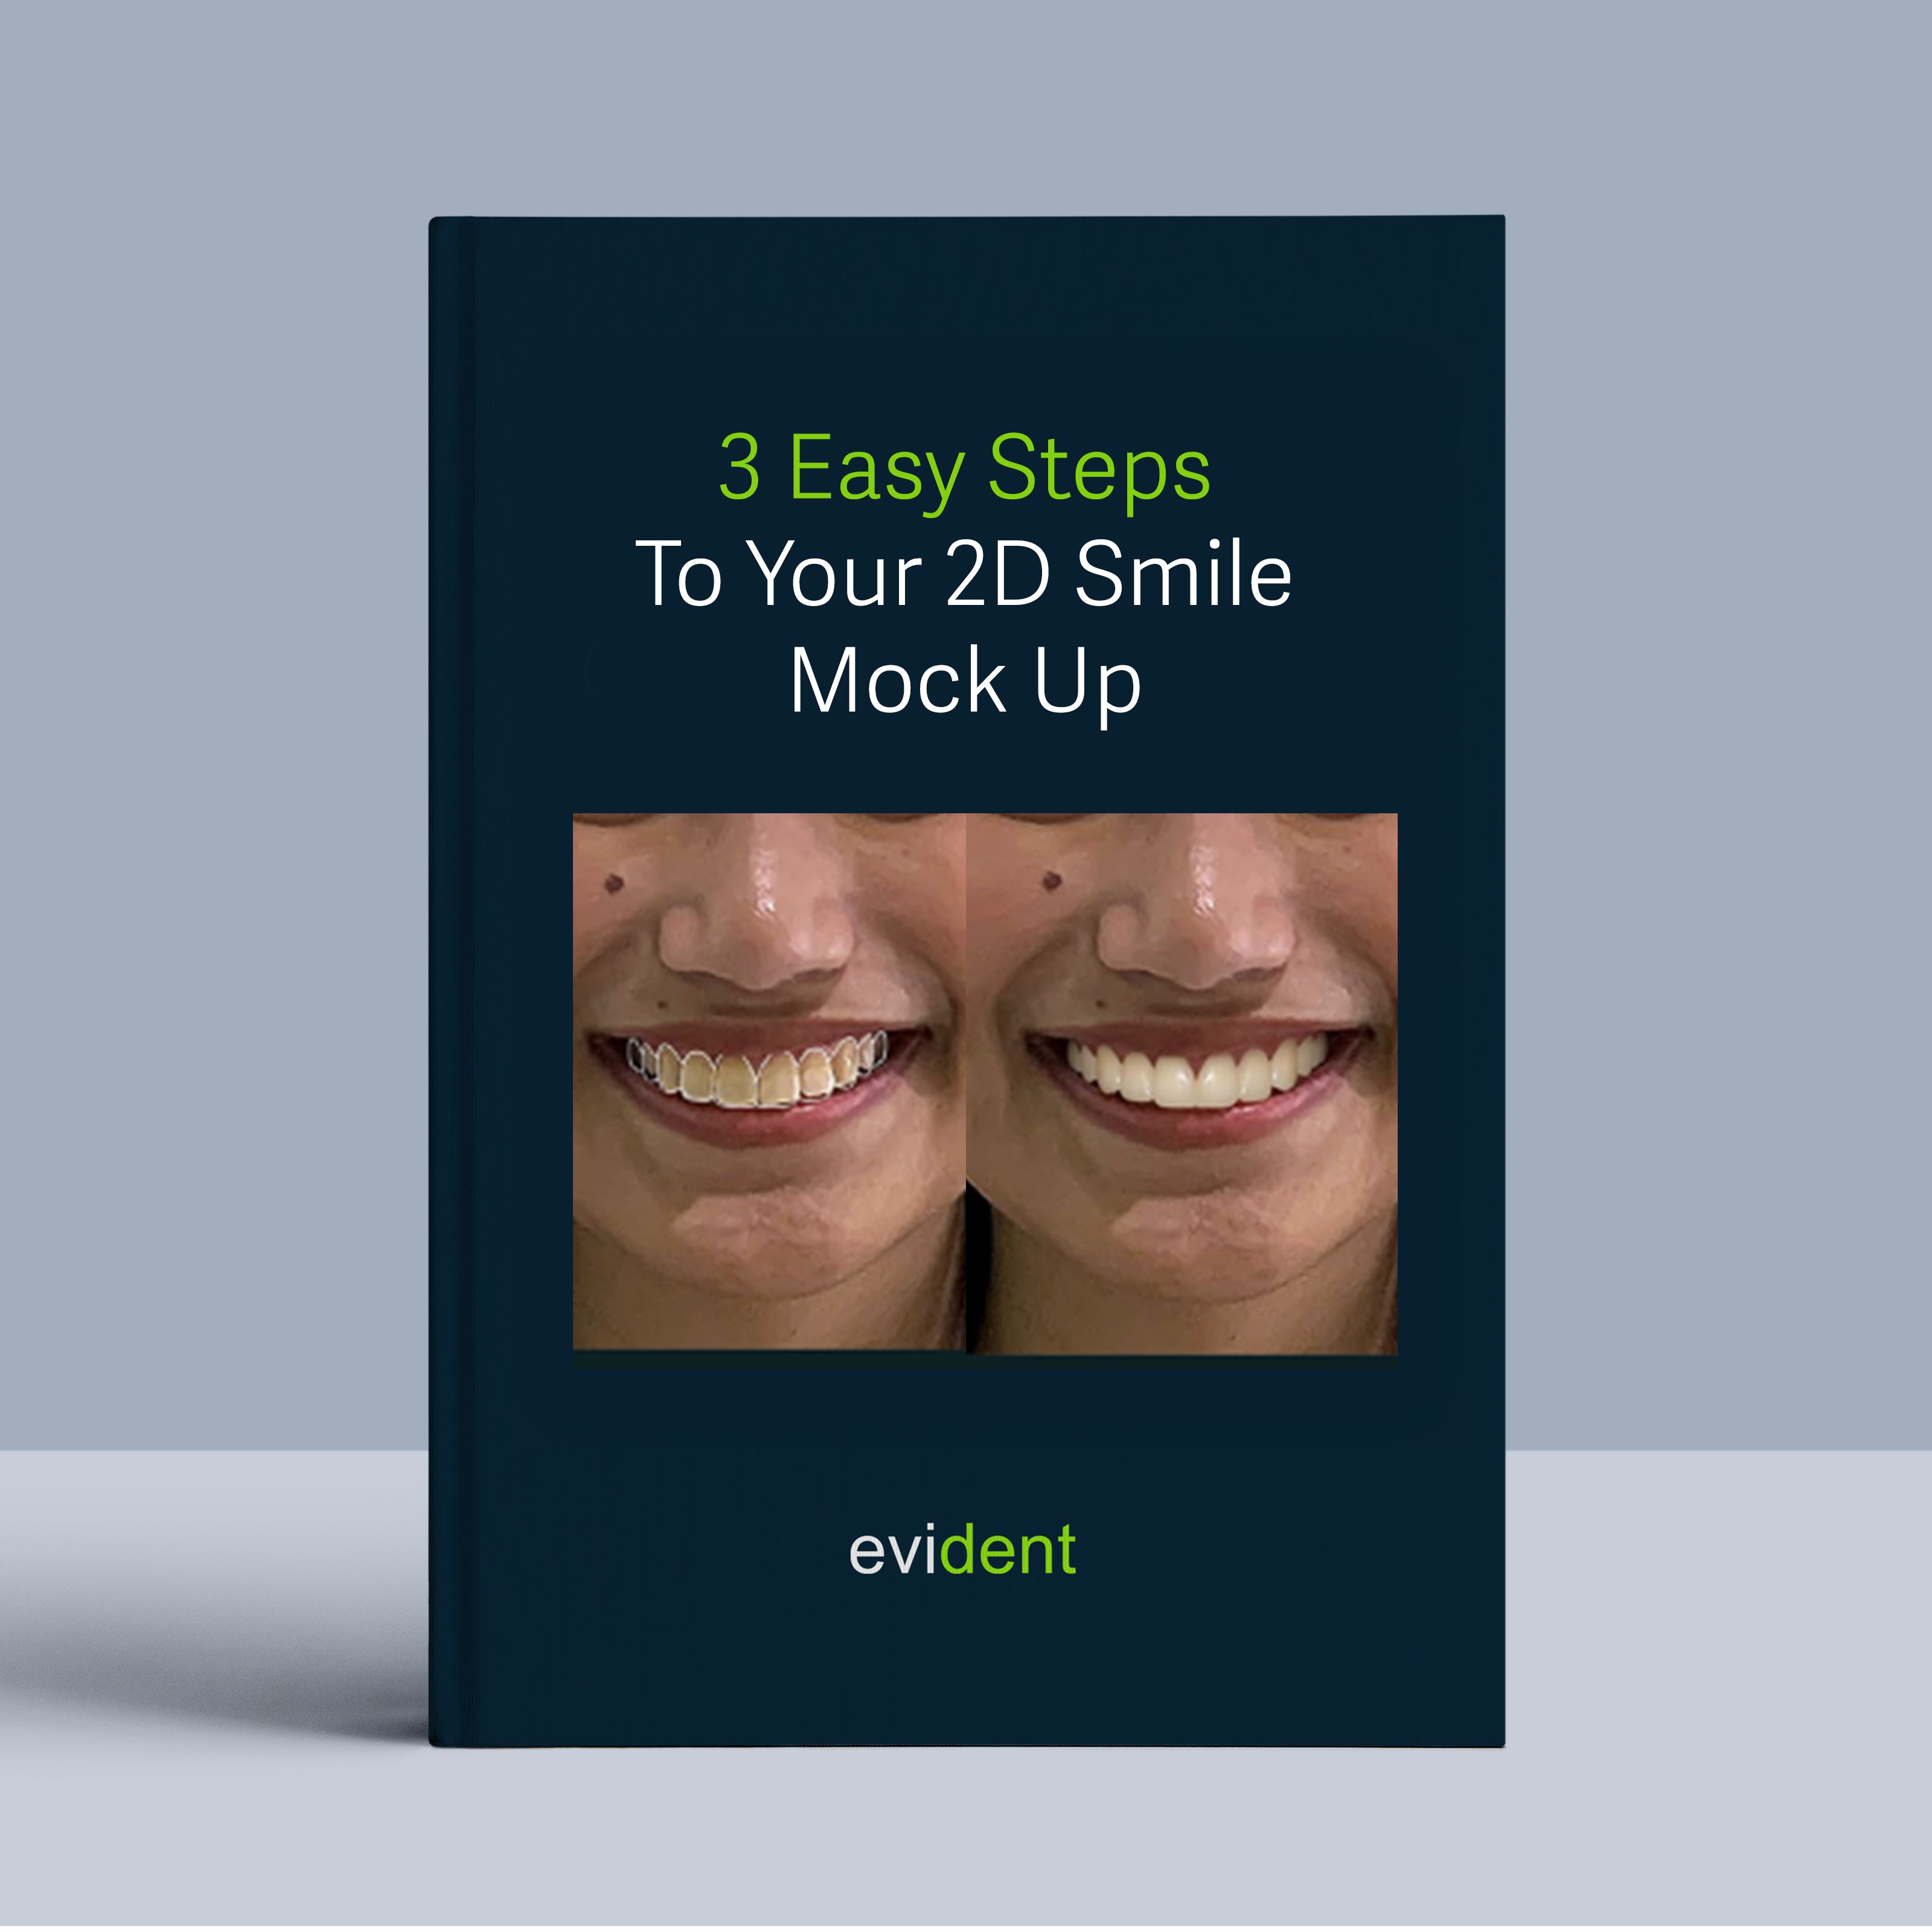
2D smile mock up provides a visual representation of the potential treatment outcome, helping patients understand and visualize the proposed changes to their smile. It allows for customization of tooth shape, shade, and other aesthetic factors, significantly increasing patient confidence and willingness to proceed with treatment. However, many practices hesitate due to the perceived learning curve of digital workflows.
But the good news is, with the right tools and a streamlined approach, you can easily achieve this workflow yourself or use this page to train your staff. This 3 easy step guide contains all the information you need. Let’s break it down into three simple steps:
Step 1. Gather Information During the Patient Visit (Record Appointment)
1.1 Gather High-Quality Photographs:

Full Face – Smiling: Capture a frontal view of your patient’s face in a natural, full smile.
1.2 Compile Your Patient’s Treatment Plan Information

After completing your patient record appointment, you will need to gather and organize essential details. Follow these steps to ensure you have all the necessary information.
- Collect Patient Demographics:
Patient’s name
Contact information
Date of birth
- Document the Chief Complaint:
Understanding the patient’s primary concern will help tailor the 2D smile mock up for future dental treatment options to address their specific needs.
- Summarize Diagnostic Findings:
Results from the clinical exam
Intraoral photos
Radiographs
Any other pertinent diagnostic tests - Record Treatment Goals:
Patient’s desired outcomes
Discuss key aspects: If the 2D smile mock up is part of a more comprehensive treatment plan, such as full-mouth cosmetic veneers, rehabilitation, or implant-supported restoration, understanding the overall goals will ensure this 2D smile mock up aligns with the intended outcome.
Once you have compiled all this information, you are ready to submit the case to Evident.
Step 2. Submitting Your Case To Evident Hub
2.1 Log in to Evident & Order

Log in to Evident
- To submit your case to Evident, please log in to your account at Evident Hub.
- If you do not have an account yet, click on “Get Started” and select “Create Account”
Ordering Process
- Once logged in, browse the list of products on the Hub and find Photographic Case Presentation
- Click on “Order Now” to proceed with your order.
2.2 Upload case Information
This guided ordering form ensures that the vision of both the patient and the doctor for this case is precisely communicated to our design team. Follow these steps to complete the form:
- Add Patient Information: Fill in your practice name, email address (optional), last name, first name, and birthday (optional).
You can choose to rush this case to your designs back as soon as possible

2.3 Complete the order form according to the instructions provided by the Evident team.
1. About This Treatment:
- Select “Virtual Smile Mockup with Outline” from the dropdown menu.
2. Tooth Chart:

- Notation: Choose your preferred tooth numbering system (Universal or FDI).
- Treatment Plan:
- Select the specific restorations for each tooth (Crowns, Veneers, etc.).
- Indicate if gingival recontouring is desired.
3. Additional Preferences:

- Tooth Shade: Select the desired shade from the dropdown menu (Bleach, A1, B1, C1, D2).
- Tooth Shape: Choose the preferred tooth shape (Natural, Ovoid, Square).
4. RX Notes:

- Provide Detailed Instructions: Use this section to include the information you gathered in Step 1.2, along with any other specific requests or preferences not covered in the form.
To ensure your design achieves the desired results, provide detailed and straightforward instructions for your designer by filling up RX Notes section. Include the following key components:
- Goal: Clearly state the primary goals
2.4 Upload Required Files

Upload the “Full Face – Smiling” photo from step 1.1.
Review and Submit: Ensure all information is accurately filled out and all required files are uploaded. Click ‘Proceed’ to submit the form.
2.5 Track Progress and Communicating with Your Designer

To ensure a seamless experience and stay informed about the progress of your designs, you can track and communicate with your designer through the Case Management section. Here’s how:
- Review Case Progress: Access the Case Management section to review the progress of your case at any time. Stay updated on the current status and any actions taken by the design team.
- Messages Your Designer: If you have questions or need to share details, easily send messages to your designer in the Case Management section.
- Review and Approve Your Case: Review the completed files and make any necessary adjustment request or approvals before finalizing the case. Once the design meets your requirements, you can approve and download the file.
By using these features, you can efficiently manage your cases, ensure clear communication with your designer, and approve designs with confidence.
2.6 Your Case is Complete!
Once complete, you will receive the following files
- Smile with Before

- Smile with Outline

- Smile with After

Congratulations!
Your 2D Smile Mock Up Is Now Ready.

If you have any questions about the process, feel free to email us at akang@evidentdigital.com or call us at +1 (877) 909 7770.


