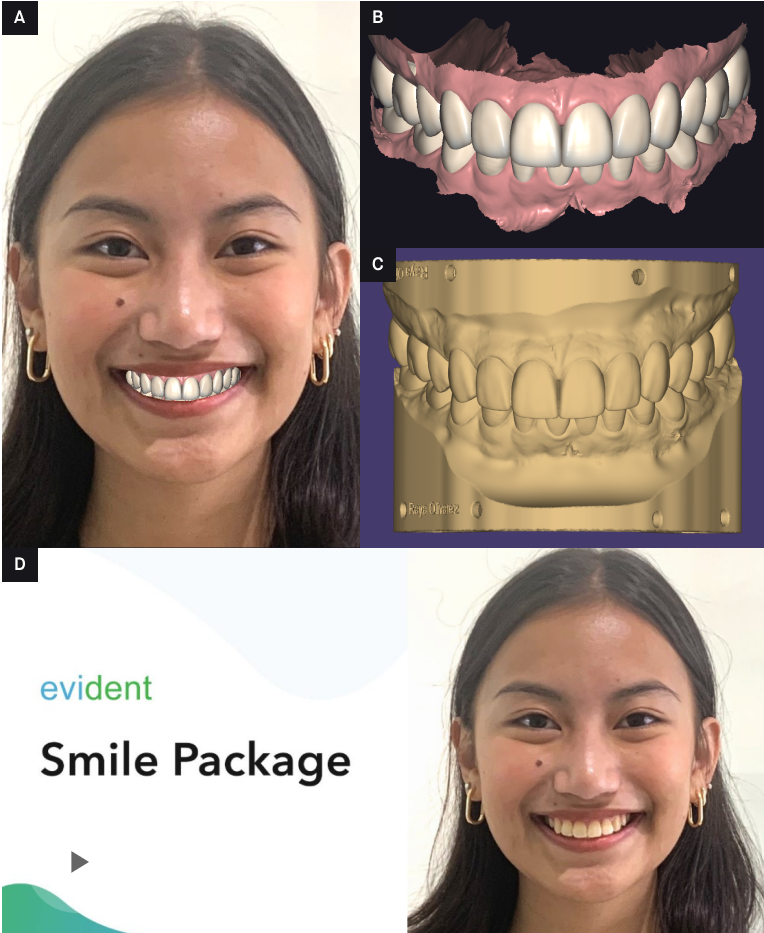
Transform patient consultations and boost treatment acceptance with Evident’s Smile Package. This comprehensive solution empowers your team to create personalized, photorealistic smile transformations, guiding patients seamlessly from initial consultation to final smile delivery.
What you will get back from us:
- Case Acceptance Presentation
- Diagnostic Wax Up
- Choose up to 4 of the following digital CAD files:
- Trial Smile (One-piece veneer style to try in over the patient’s existing teeth)
- Additive Shell temps (un-prepped model)
- Virtually prepped shell temps (with a 0.6 mm virtual prep)
- Prepped shell temps (chairside prep and IOS scan)
- Final restorations
We Will Make You Shine!
Same-Day Smiles, Streamlined Workflow: Pre-book with us to offer your patients same-day smile transformations with a diagnostic wax-up, case acceptance presentation, trial smiles, and temporary teeth delivery — all while maximizing your chair time efficiency.
1. Diagnostic wax up
- Digital 3D CAD Design: Present a detailed 3D CAD design showcasing the proposed smile transformation, allowing the patient to visualize their before-and-after smiles in intricate detail.
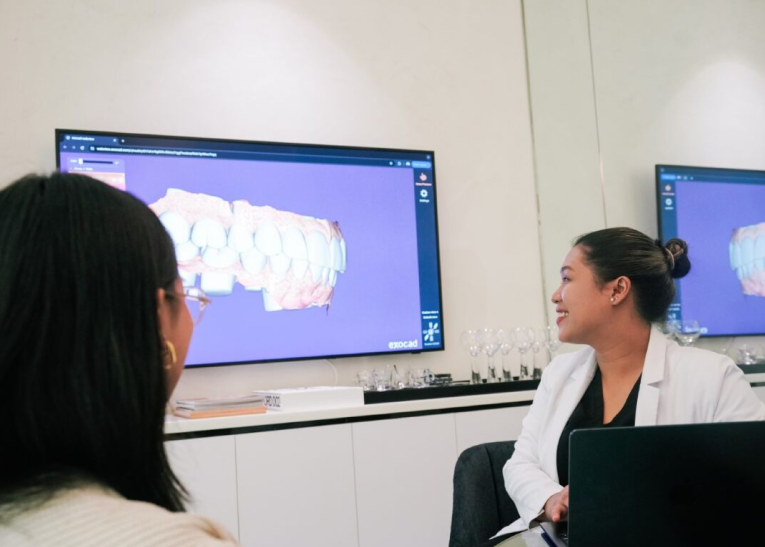
2. Comprehensive smile presentation
- Enhanced Patient Communication: After gaining waxup approval, present a professional PowerPoint outlining the smile plan, and other details, ensuring transparency and clarity.
3. Trial smile experiences
- Snap-on Trial Smile (un-prepped teeth): Provide an instant preview during the consultation with a snap-on trial smile, allowing the patient to visualize their potential new smile.
- Additive Shell Temp (un-prepped teeth): Provide an additional trial smile option with 3D-printed temporaries that can be placed over unprepared teeth, offering another visualization tool for patients.
4. Temporary teeth and final calibration
- Prepped Shell Temp (Same-Day Turnaround): Following tooth preparation, fabricate and place 3D-printed temporary crowns in the same appointment. Pre-book to ensure real-time turnaround, minimizing patient wait times and maximizing convenience. These temporaries enable the patient to experience their new smile in daily life while also facilitating occlusal calibration and respecting biological width.
5. Final restoration design
- Design with Confidence: Leverage the data gathered from the temporary phase to design the final restoration, ensuring optimal function and aesthetics.
- Deliver the Dream Smile: Fabricate the final restorations in-house or outsource to a trusted lab, then deliver them to your patient, providing them with a smile they’ll love.
Let’s break it down into three simple steps:
Step 1. Gather Information During The Patient Visit (Record Appointment)
1.1 Prepare clinical facial photo of the patient
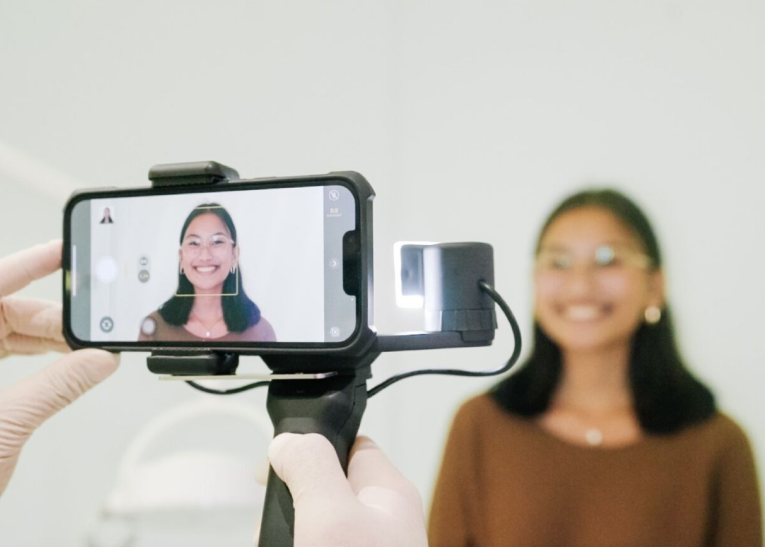
Here is a pro tip to click the perfect photo every single time.
- Line up your camera about 5 feet away and take a photo of their smile. Zoom in to the face just enough to see the patient’s mouth but leave some space around the face so that the chin and forehead are not cut off.
- A quick tip for taking photos is to enable a 3×3 grid. This can be done with any camera or smartphone. Aligning the top horizontal line with the eyes provides a perfect reference when taking photos
- Snap a photo of their natural smile.
1.2 Capture intra-oral scans from your patient
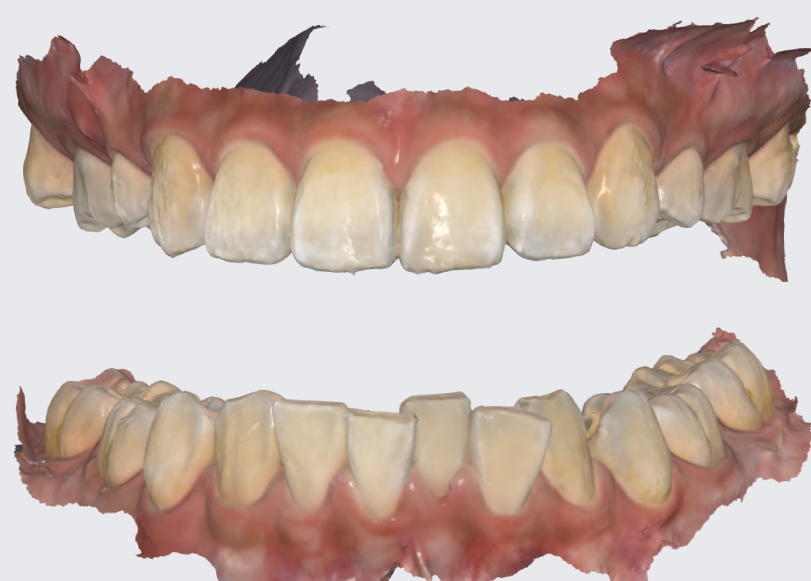
Utilize intraoral scans to create a digital mold of your patient’s mouth. Three scans are required to ensure comprehensive and accurate data for treatment planning.
- Full Upper Arch: A complete scan of the upper teeth and gums.
- Full Lower Arch: A complete scan of the lower teeth and gums.
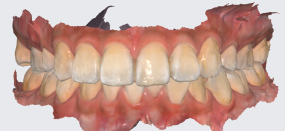
- Bite: Make sure to scan the full arch for the most accurate bite registration.
Note: Double check if the bite is misaligned.
1.3 Compile Your Patient’s Treatment Plan Information
After completing your patient record appointment, you will need to gather and organize essential details for the case treatment planning. Please keep in mind that these are the files you can expect from us:
- Digital Smile Design presentation for the consultation
- 4 of the following digital CAD files for the procedure:
- Diagnostic Wax Up
- Trial Smile (One-piece veneer style to try in over the patient’s existing teeth)
- Virtually prepped shell temps (with a 0.6 mm virtual prep)
- Prepped shell temps (chairside prep and IOS scan)
- Shell temps (un-prepped model)
- Final restorations
Follow these steps to ensure you have all the necessary information.
- Collect Patient Demographics:
Patient’s name
Contact information
Date of birth - Document the Chief Complaint:
The main reason the patient is seeking treatment (e.g., dissatisfaction with their smile, concerns about worn-down teeth) - Summarize Diagnostic Findings:
Results from the clinical exam
Intraoral photos
Radiographs
Any other pertinent diagnostic tests - Record Treatment Goals:
Patient’s desired outcomes
Discuss aspects like aesthetic improvements, function enhancement, or bite correction
Once you have compiled all this information, you are ready to submit the case to us for Evident Smile Package.
Step 2. Submitting Your Case To Evident Hub
2.1 Log In At Evident Hub & Select Evident Smile Package
Log in to Evident & Select Evident Smile Package
- To submit your case to Evident, please log in to your account at Evident Hub.
- If you do not have an account yet, click on “Get Started” and select “Create Account”
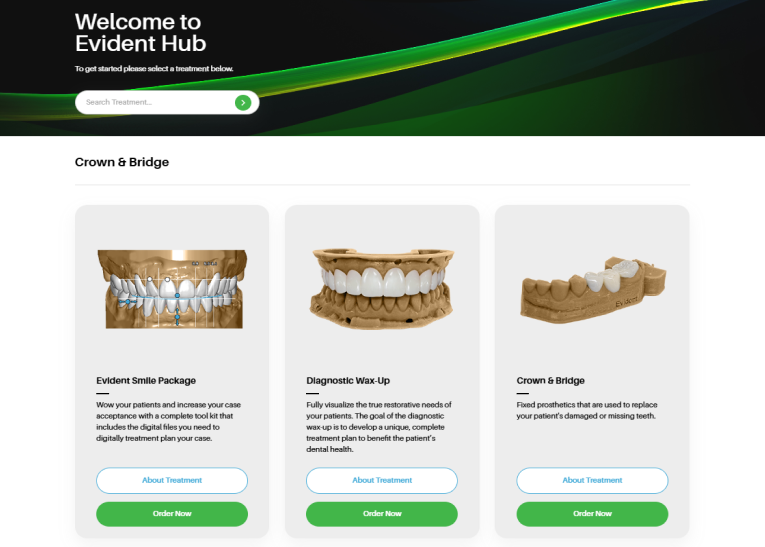
Ordering Process
- Once logged in, browse the list of products on the Hub and locate “Evident Smile Package”
- Click on “Order Now” to proceed with your order.
2.2 Upload case informations
This guided ordering form ensures that the vision of both the patient and the doctor for a case planning is precisely communicated to our design team. Follow these steps to complete the form:
- Add Patient Information: Fill in the your practice name, email address (optional), last name, first name, and birthday (optional). You can choose to rush this case to your designs back as soon as possible.
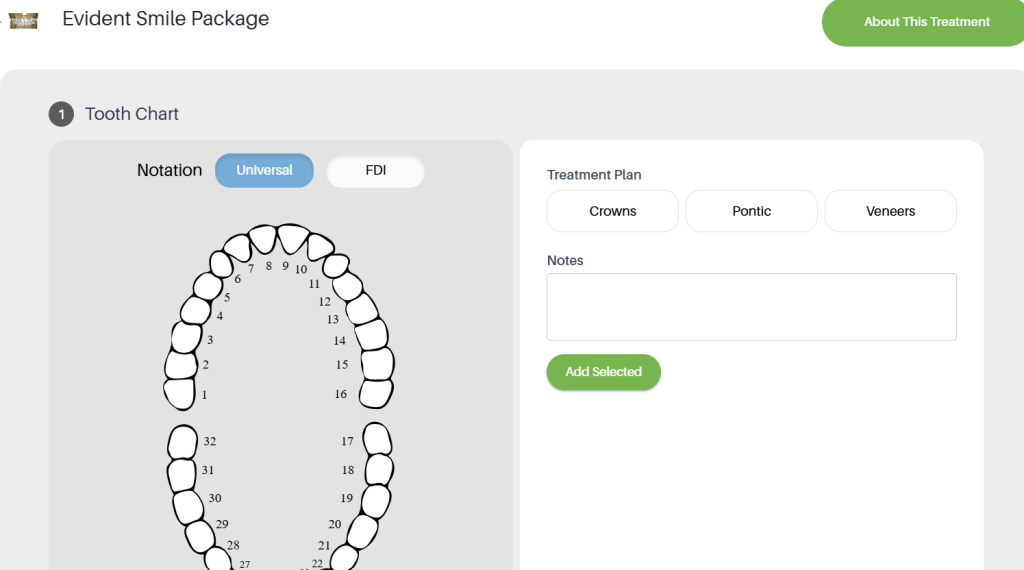
- Complete the Tooth Charting Numbers: Indicate the relevant teeth on the tooth chart by clicking on the corresponding numbers, select the treatment plan and add any specific notes if necessary.
- Specify Details: Answer the questions to provide detailed requirements for the case planning, such as misaligned tooth correction, smile type, and any additional files needed.
- Upload Required Files:
IOS Scan (STL/PLY files): Drag and drop the upper, lower, and bite scans.
Additional Files: Drag and drop in the patient photo(s) in this section. - Review and Submit: Ensure all information is accurately filled out and all required files are uploaded. Click ‘Proceed’ to submit the form.
2.3 Select Your Fabrication Preference
If you are printing the design files you requested in-house, you can customize your fabrication preferences to streamline the process.
Follow these steps to ensure your design is ready for printing:
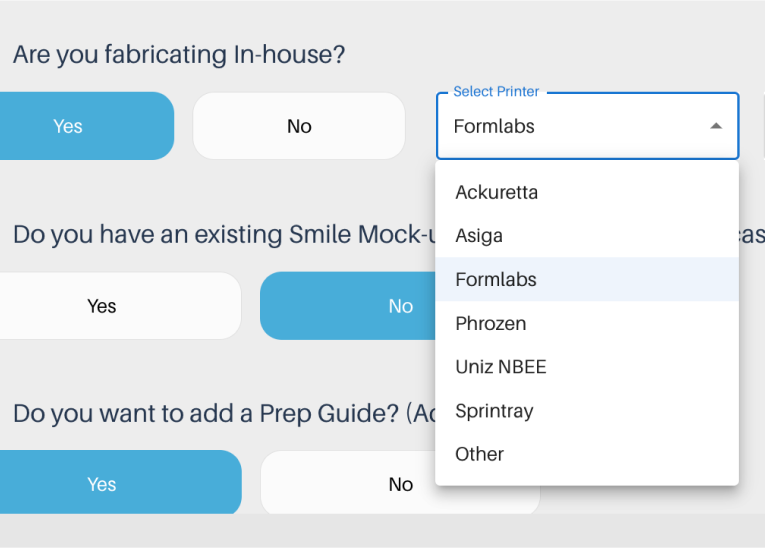
- Indicate In-House Fabrication: Select ‘Yes’ or ‘No’ to indicate if you are fabricating in-house.
- Choose Your Printer: If you selected ‘Yes’ for in-house fabrication, choose your printer from the dropdown menu.
- Specify Resin Type: Enter the type of resin you will 3d print with.
- Select Pre-Nested Files: To make the fabrication process even easier, opt for pre-nested files. This ensures that your design is ready to print with proper supports, so all you need to do is drag, drop, and print. There is an additional fee of $10 per build plate for pre-nested files.
By setting these preferences, you can ensure a smooth and efficient printing process, with designs that are ready to go and require minimal preparation.
2.4 Add Clear Instructions for the Evident Smile Package
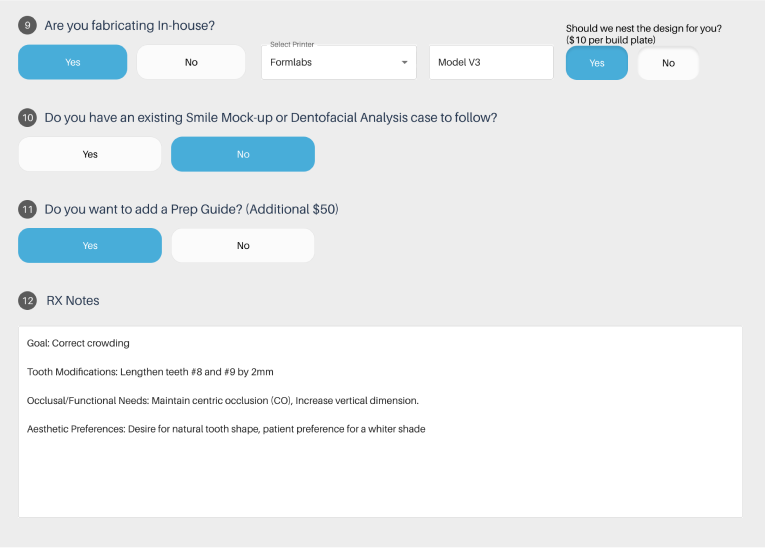
To ensure your Evident Smile Package achieves the desired results, provide detailed and straightforward instructions for your designer by filling up RX Notes section. Include the following key components:
- Goal: Clearly state the primary goal, for example, “Improve aesthetics” or “Correct crowding.”
- Tooth Modifications: Detail specific modifications, such as “Lengthen teeth #8 and #9 by 2mm” or “Close diastema between #22 and #23.”
- Occlusal/Functional Needs: Describe necessary functional adjustments, like “Maintain centric occlusion (CO),” “Establish canine guidance,” or “Increase vertical dimension.”
- Aesthetic Preferences: Specify the aesthetic preferences, including examples like “Desire for natural tooth shape” or “Request for minimal spacing between teeth.”
2.5 Track Progress and Communicating with Your Designer:

To ensure a seamless experience and stay informed about the progress of your Evident Smile Package, you can track and communicate with your designer through the Case Management section.
Here’s how:
- Review Case Progress: Access the Case Management section to review the progress of your case at any time. Stay updated on the current status and any actions taken by the design team.
- Messages Your Designer: If you have questions or need to share details, easily send messages to your designer in the Case Management section.
- Review Your Case: Review your selected CAD files using the preview files (HTML viewer). This feature allows you to see the designs in detail and make any necessary adjustments or approvals before finalizing the case.
- Approve Your Case: Upon approval of your CAD files, we’ll provide a comprehensive PowerPoint presentation to enhance your patient consultation.
Then you are ready to communicate your treatment plan with your patient clearly and effectively with visually appealing slides!
2.6 Your Case is Complete
Once complete, you will receive:
- Digital Smile Design presentation for the consultation
- Digital CAD files you selected for the procedure
Step 3. Fabricate Your Smile Package Design files
3.1 Download nested files from Evident
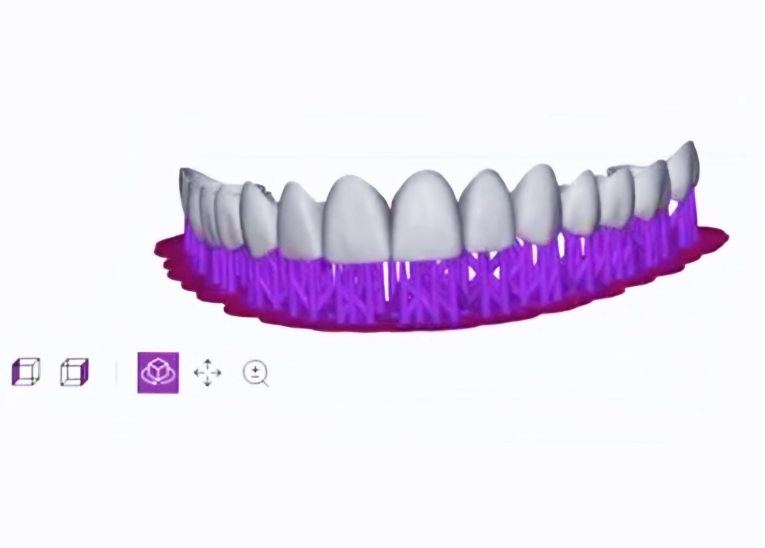
After your case is complete, you can download the print ready design files by selecting your case in case management tab.
3.2 It’s Time To 3D Print
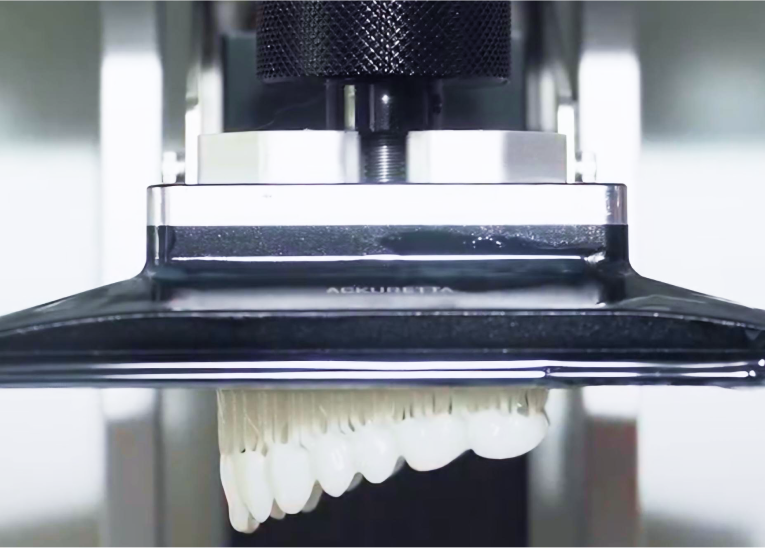
Fabricate your designs using your in-house 3D printing workflow.
Follow three steps:
- 3D Print your designs.
- Wash the 3D printed designs.
- Cure them to finalize its durability.
For detailed process and workflow instructions specific to your 3D printer model and resin, please contact your 3D printer manufacturer’s support team.
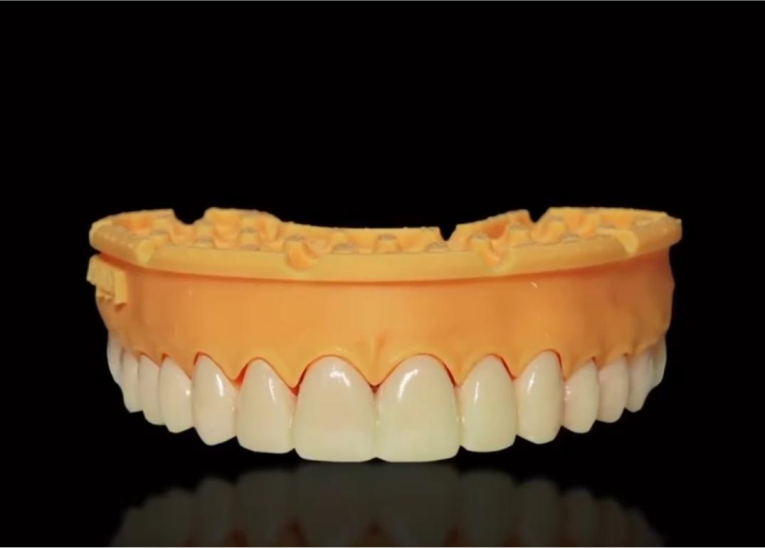
Congratulations!
The Smile Package Is Now Ready.
If you have any questions about the process, feel free to email us at akang@evidentdigital.com or call us at +1 (877) 909 7770
Outsource Fabrication
To further streamline your workflow, we can help by coordinating fabrication. Here’s how we can assist:
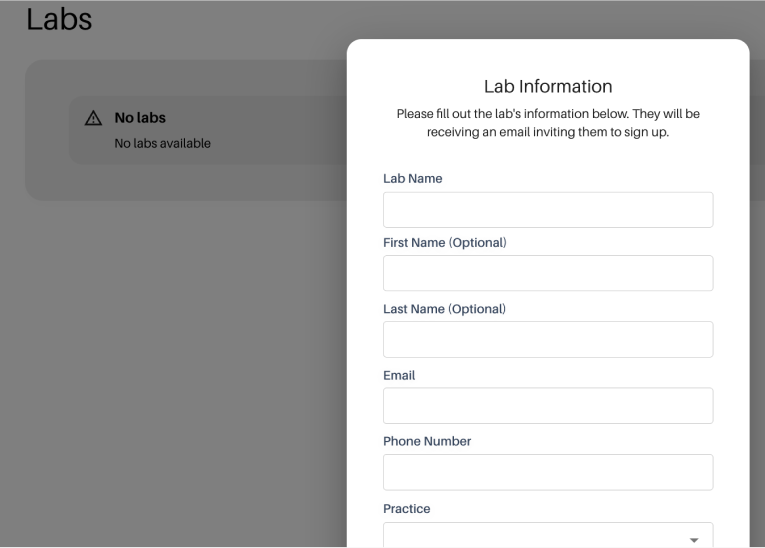
- Invite your existing lab: You can invite your preferred lab by choosing the option in the top right corner of the Evident Hub screen. We will help coordinate the fabrication process with them.
- Ask Evident for a preferred lab partner: Alternatively, your account manager can suggest an Evident preferred lab partner for a seamless experience.